Adding a custom font to your Shopify store (for free)

This is a step-by-step tutorial on how to use a custom font for your Shopify store. There are a few paid apps that also help you in using a custom font, but personally I don’t think it’s worth the monthly costs and it’s relatively easy to do it for free.
So, let’s start!
Find a custom font that you’d like to use on your store. There are many websites that offer free and paid fonts that you can use.
Make sure the font is in WOFF and WOFF2 format. If that is not the case and your font is in TTF format, use a website like https://cloudconvert.com/ttf-to-woff to convert your font in both formats.
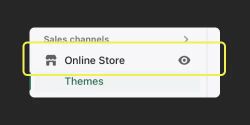
Open Shopify and click on ‘Online Store’
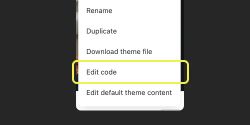
- Click on the three dots next to ‘Customize’ and tap on ‘Edit code’.
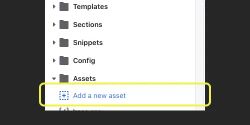
- On the left side, open the Assets folder and click on ‘Add a new asset’.
- Upload both the WOFF and WOFF2 file of your font that you’d like to use, either by clicking on ‘Add file’ or dragging the files in the box.

Now in the assets directory, open the base css file. In some themes this might be called ‘theme.scss.liquid’, in others it might be called ‘base.css’.
Scroll all the way down and paste the following code:
@font-face {
    font-family: ‘Font Name;
    src: url(‘font-name.woff2') format('woff2'),
         url(‘font-name.woff') format('woff');
    font-weight: normal;
    font-style: normal;
}
Make sure that the name of ‘font-name.woff2’ and ‘font-name.woff’ is exactly the same as you have uploaded it to the assets folder.
- Now we need to choose where you’d like to use the font. Let’s say you’d like to apply it to all headings H1, H2 and H3. Than paste the following code:
h0, h1, h2, h3 {
    font-family: 'Font Name'
  }
Just to keep things clear for yourself (and for others), I would also add the following comment lines:
/* start custom code for font replacement */

All of the code given above here.

/* end custom code for font replacement */
- Finally, what is usually a bit more difficult is making sure that all of the fonts on your website are replaced with your custom font. For that, open the web inspector.
Safari: Develop > Show Web Inspector (or shortcut: option + cmd + i)
Chrome: View > Developer > Inspect Elements
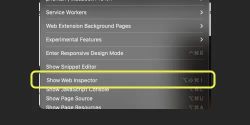
- Than click on the ‘Start element selection’ (or shortcut: shift + cmd + C).
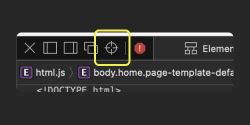
- Choose the element of which you’d like to change the font. In my case it’s a paragraph (p):
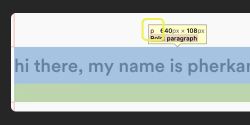
- Now go back to your base css file and paste the following code:
p {
font-family: 'Font Name'
}
Keep in mind this is only for a paragraph. In my own Shopify store, I needed to add many more elements and my code is looking as follows:
.banner__text, div, span, .span, button, p, a, h4, .h4, h5, .h5, .button, .product-form__input, .label, .price, li
   { font-family: "gt_walsheim_proregular" }
I hope this step-by-step tutorial helps you in customising the font of your Shopify store. If you see any mistakes or if you still have any trouble changing the font on your store, don’t hesitate to reach out to me.